
How to create an Event
Create an Event when your Unit needs one current place for the schedule, location, RSVP, and volunteer plan. This example creates Trail Cleanup for Wolf Patrol and Parents.
1. Start a new Event
Section titled “1. Start a new Event”Open Events and select Add. On the New Event screen, enter a title members will recognize, such as Trail Cleanup.
Add an Event image or pictograph when it will help people recognize the activity. In the description, include the arrival plan, what to bring, costs, adult or sibling expectations, and where changes will be posted.
2. Set the timing and location
Section titled “2. Set the timing and location”Set Starts and Ends, or turn on All day when the Event has no specific times.
Open Location and search for a Google place or enter the location manually. A location name is required. The street address is optional.
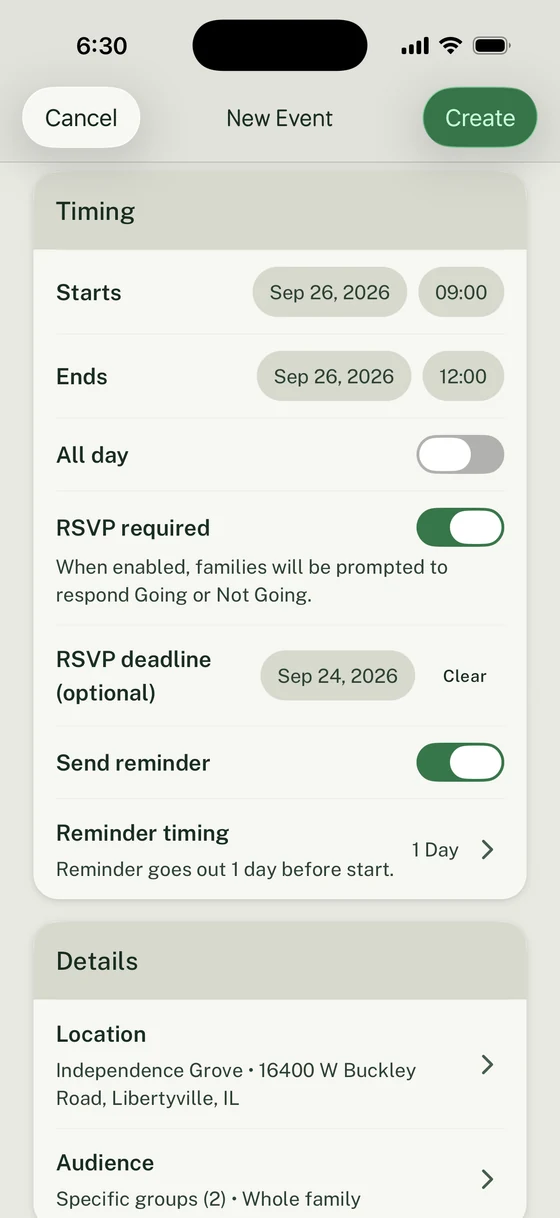
Set the Event’s timing, response deadline, and reminder, then check the location and audience before creating it.
3. Choose the audience
Section titled “3. Choose the audience”Open Audience and choose:
- Whole unit when everyone in the Unit should see and respond to the Event.
- Specific groups for one or more dens, patrols, committees, or other Groups.
For Trail Cleanup, choose Specific groups, select Wolf Patrol and Eagle Patrol, then select Done. At least one Group is required for a Group audience. Only available Groups can be selected. Done applies the audience choices to the draft; Cancel or Back leaves the previous choices in place.
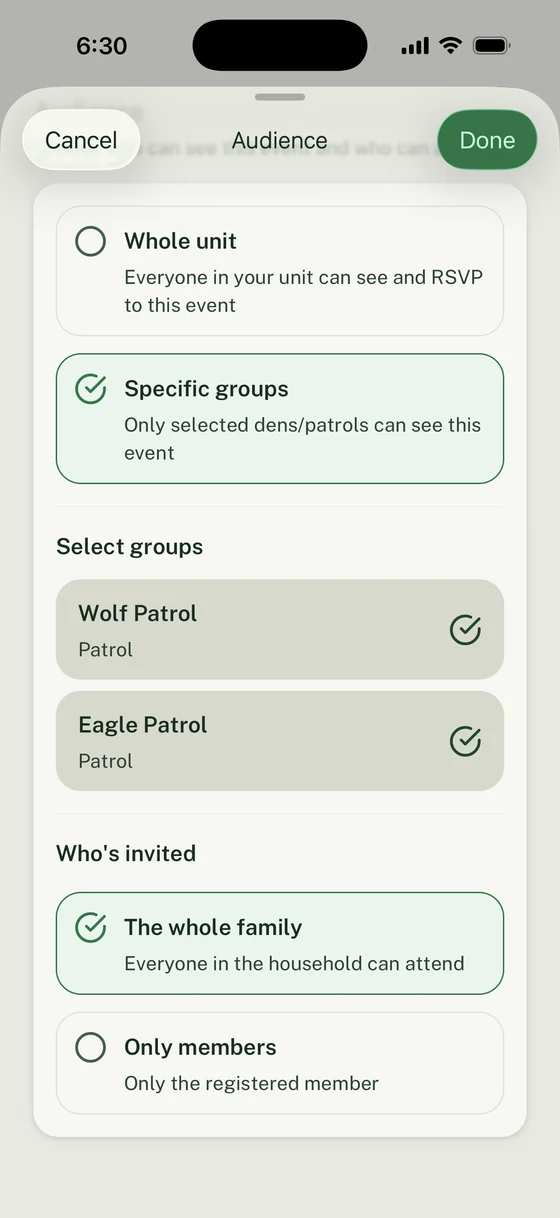
The selected Groups are the targeted audience. Household or role-based access may also apply.
Under Who’s invited, choose Household when Household members can attend or Only members to limit attendance to eligible Unit members in the Event audience. Woggle determines which people can be selected.
4. Set RSVP and notification expectations
Section titled “4. Set RSVP and notification expectations”Keep RSVP required enabled when Households must answer. You can add an optional RSVP deadline on or before the Event date.
Current RSVP responses are Going and Not Going. Clearing a choice leaves no response.
Use Send reminder when Woggle should send an Event notification at the selected time before the Event. If that time is already due, Woggle asks whether to Send now before it creates the Event.
5. Add volunteer roles when needed
Section titled “5. Add volunteer roles when needed”Turn on Enable volunteer signups when the Event needs specific jobs. Add each role with a name, number of spots, optional notes, and the adults-only setting.
For the complete role setup and Household signup path, follow How to add and claim volunteer roles.
6. Review and create the Event
Section titled “6. Review and create the Event”Review the title, description, timing, location, audience, who’s invited, RSVP deadline, notification setting, and volunteer roles. Select Create.
Woggle opens the published Event detail after creation. Eligible audience members may receive Event notifications according to their notification preferences. Quiet hours can silence routine push notifications, but they do not pause delivery.
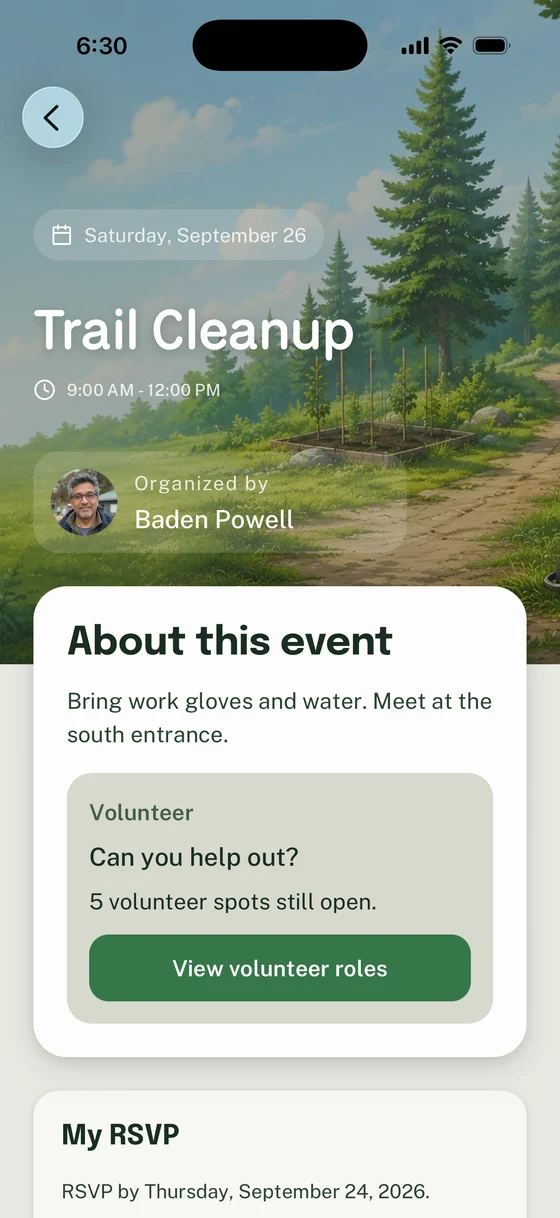
The published Event is the current source for its schedule, location, response, and volunteer plan.
Recover a draft or correct an Event
Section titled “Recover a draft or correct an Event”An unfinished Event draft is kept for the same account and Unit. Reopen Event creation to continue it. If Unable to load draft appears, try loading it again before using Start over, which discards that draft.
If Check event details appears, correct the highlighted fields and submit again. Wait for creation to finish before starting another Event. Location and audience edits are applied when you finish their sheets; canceling leaves the prior draft values intact.
Events connected to Scoutbook can have source-owned or read-only details. Follow How to connect a Scoutbook calendar to understand which changes belong in Woggle and which belong in Scoutbook.
If details or the audience change: Open Event actions, choose Edit event, update the plan, and save. Eligible members in the current audience may receive an Event update notification.
The activity will not happen. Choose Cancel event. The Event remains visible as canceled, and eligible audience members may receive a cancellation notification.
The Event should be removed from Woggle. Choose Delete event. Deleting is separate from canceling and does not notify attendees.
A focused update is needed. Update the Event first, then send an Announcement that points members back to the current Event.
Thanks. Your feedback helps us keep this page useful.